Buying guide
What size desk do you need for a 34-inch ultrawide monitor?
Compare 120cm, 140cm and 160cm desks for a 34-inch ultrawide, with stand footprints, arm checks and editable room layouts.
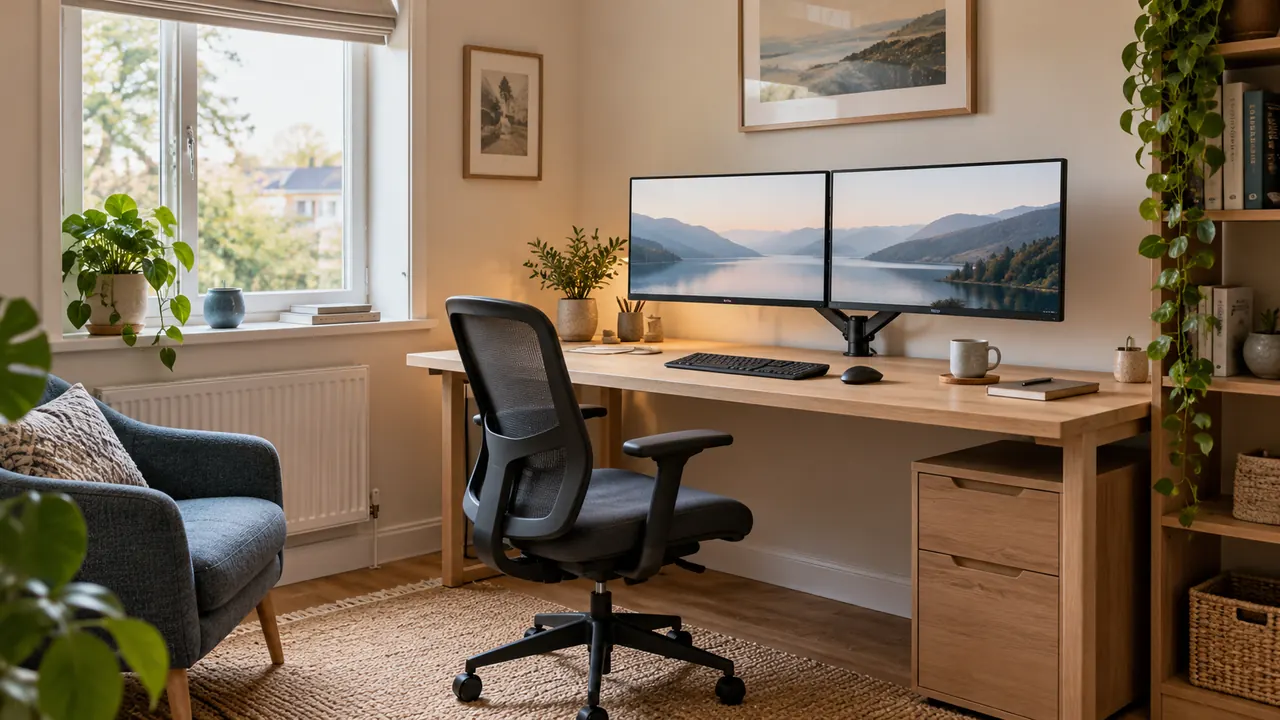
Start by trying a 140 × 80cm layout for a 34-inch ultrawide, keyboard and mouse. A 120 × 60cm desk may work if you keep the setup compact; 160 × 80cm gives you more room for paperwork or an open laptop.
Your monitor's housing and stand, plus the space in your room, will decide which size makes sense.
An ultrawide can take up less width than two separate displays, but its stand may still push the keyboard towards the front edge. Measure everything you'll keep on the desk before ordering furniture.
The examples below use one documented monitor and made-up layouts to show the sums; swap in your own equipment measurements as you go.
How wide is a 34-inch ultrawide monitor?
A 34-inch screen measures 34 inches from corner to corner. To see whether it will fit between two shelves, look up the full width of the monitor. The aspect ratio, casing and curve can all make a difference.
Check the straight-line width in the specifications, since the size of the box and the distance along the curved screen answer different questions.
For a concrete reference, Dell lists the U3425WE at 813.46mm wide and 240.43mm deep with its stand. Converted to centimetres, that is 81.346cm wide and 24.043cm deep.
These measurements come from the official Dell U3425WE datasheet.
They illustrate why the full product specification is useful; they do not establish the dimensions of every 34-inch monitor.
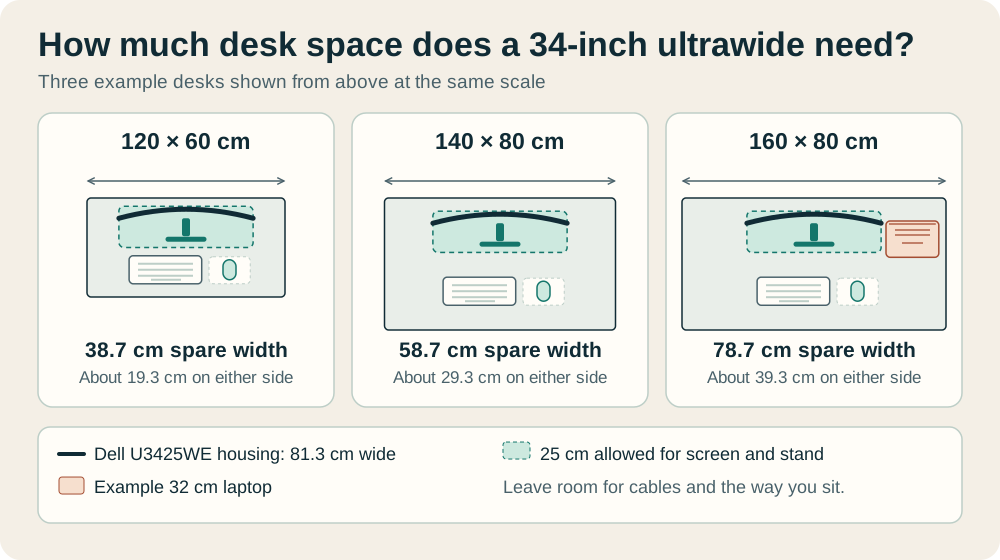
Put that 81.346cm-wide monitor in the middle of a 120cm desk and there’s 38.654cm left across the two sides, or about 19.3cm each. That can disappear quickly if you want to keep a laptop, two speakers or a desk lamp beside it.
Items that sit in front of the screen can use some of the same width. Anything beside the casing needs room of its own.
Record width, depth with the intended support, and the support's contact footprint separately. Overall monitor depth tells you the bounding space occupied by the assembly; it does not necessarily describe a solid rectangular base.
A drawing in the manufacturer's manual is more informative than a photograph when you need to place a keyboard close to an irregular stand.
Leave room for the things you use together
Start with what must remain usable while you work. A closed laptop in a vertical stand creates a different requirement from a laptop whose screen is your video-call display.
A notebook that comes out twice a week can replace another item temporarily; a document you consult every few minutes needs a permanent position.
The table below uses the Dell housing width only for the subtraction. The arrangements are hypothetical planning choices, not product tests or ergonomic thresholds.
| Desktop width | Width outside an 81.346cm housing | Likely planning trade-off |
|---|---|---|
| 120cm | About 38.7cm combined | Keep the laptop closed or place occasional items in front |
| 140cm | About 58.7cm combined | More freedom for a small side item, depending on its depth |
| 160cm | About 78.7cm combined | More scope for an open laptop, documents or separate task area |
You don't have to split the spare width evenly. Keep the screen and keyboard aligned with your seat, then try leaving a larger document area on one side. That may be more useful than two narrow strips.
Keep the mouse close to where you normally use it; the keyboard doesn't need to sit at the exact centre of the desktop.
If the ultrawide replaces an existing pair of screens, compare the tasks as well as the furniture dimensions. The 34-inch ultrawide versus dual-monitor guide covers that separate decision.
A desk purchase should follow the equipment arrangement you intend to use, rather than an assumption that every extra screen improves the setup.
Why a 60cm desk can feel tight despite enough width
Depth determines how many useful positions are available between the rear edge and your hands. Stand feet, the keyboard, the mouse area and paperwork all compete for that space.
A curved housing can also have a different front-to-back envelope from a flat panel, even when the advertised diagonal is identical.
For an initial sketch, divide the desktop into a rear service zone, an assembly zone and a front working zone. The service zone represents the space you choose to leave for connectors and cable routing.
It is not a substitute for the manufacturer's cable-clearance requirements. The assembly zone should use the real stand drawing, and the front zone should reflect how you type and move the mouse.
Some objects overlap in a top-down drawing without colliding in reality. A thin stand foot may sit beneath part of a keyboard, for example, but that only helps if the keyboard remains stable and does not rock.
Conversely, a screen floating above a notebook does not mean the notebook can open fully. Check height as well as the plan view.
Use the 60cm versus 80cm desk-depth guide for the broader depth comparison.
For an ultrawide, the useful extra check is whether you can place the screen far enough back while retaining access to its controls and cables. A deeper desk gives adjustment options; it does not automatically produce a comfortable viewing position.
Worked layout: a compact 120 × 60cm desk
This hypothetical layout is for one ultrawide, a separate keyboard and mouse, and a laptop kept closed during ordinary desk work.
It uses an 81.346cm monitor housing as the width reference, a rounded 25cm assembly-depth envelope, a 5cm rear service allowance and a 17cm-deep keyboard. The rounded envelope is a planning assumption, not another specification for the Dell.
Put the rear assembly boundary 5cm forward of the desktop's rear edge. A 25cm-deep envelope then ends 30cm from that edge. Place the keyboard with its rear edge at 35cm and its front edge at 52cm.
That leaves a 5cm gap behind the keyboard and 8cm of desktop in front. The arithmetic accounts for the full 60cm: 5 + 25 + 5 + 17 + 8.
This arrangement provides a way to test fit, not a promise that 8cm is the right front allowance for you. Sit at a mock-up and check whether your hands, chair arms and keyboard position work together.
If you must pull the keyboard forward until it meets the edge, or push the screen back until a cable bends sharply against the wall, the arrangement has failed your test.
Across the desk, a hypothetical 44cm keyboard beside a 25cm mouse area occupies 69cm before any gap between them. Those items sit in front of the monitor rather than beside its housing, so their widths do not need to be added to 81.346cm.
An open laptop placed beside the housing is a different matter. With only about 19.3cm remaining at either end of a centred screen, that addition needs a fresh plan.
Choose this size when the room benefits materially from a small footprint and the surface can remain focused. Its weakness is limited rearrangement space: a printed form, lunch plate or temporary second computer can disrupt the working area quickly.
Worked layout: a balanced 140 × 80cm desk
The second hypothetical layout keeps the same monitor reference and keyboard but increases both desk dimensions. Put the assembly envelope 8cm forward of the rear edge. With the same assumed 25cm depth, it ends at 33cm.
A keyboard occupying the band from 48cm to 65cm leaves 15cm behind it and 15cm towards the front.
Those gaps give you room to experiment. You could move the screen forward, move the keyboard back or use some of the gap for a document, provided the real stand does not obstruct it.
The purpose of the deeper desk is to offer choices after you sit down, rather than commit you to one fixed position from a diagram.
There’s about 58.7cm of width left across both sides of the monitor. Try moving the screen a little to the left and keeping your chair and keyboard lined up with the part you use most.
That gives you one bigger space at the side, which may be more useful than two narrow gaps. Measure your laptop with the lid open to see whether it will fit there without crossing in front of the monitor.
An A4 sheet is 21cm wide in portrait orientation, but its 29.7cm length still needs accounting for. A clear-looking side strip may accommodate the paper while leaving nowhere for your writing hand.
Try the actual task with a notebook and pen rather than treating the document rectangle as the complete working area.
For many single-screen home offices, 140 × 80cm is the most useful first layout to test. It gives the ultrawide breathing room without assuming that a large desktop PC, two speakers and an open laptop must all share the surface.
Worked layout: a flexible 160 × 80cm desk
The third hypothetical layout adds width while retaining the same 80cm depth. Keep the screen and input equipment aligned with the seated task position, then allocate a separate side zone. With the reference housing centred, there is about 39.3cm at each end.
A hypothetical laptop footprint 32cm wide would fit within one such width allowance with around 7.3cm remaining, before accounting for its actual lid angle, cables and neighbouring objects.
Now check the laptop in the position you'll use. Measure it open and on its stand, then look for overlap with the ultrawide at screen height. Turning the laptop towards you changes both the width and depth it occupies.
Try that angle on a paper layout before relying on the spare width in the calculation.
The added width is particularly helpful for work that alternates between a screen and physical materials: reviewing a drawing, marking a printed draft or keeping a reference book open.
Put those materials where you can reach them without constantly moving the mouse. If they are occasional references, their useful location may differ from the place used for handwriting.
The cost is room space. Mark the full 160 × 80cm footprint on the floor, then pull the chair out and open nearby doors or drawers. A larger desktop that makes the room awkward is not automatically a better ultrawide desk.
If the extra 20cm mainly becomes storage for items you rarely touch, the 140cm arrangement may be the more effective choice.
Would a monitor arm give you useful space?
An arm can remove the stand base from the main working surface. It may also let you adjust the screen between sitting positions.
However, it replaces one footprint with another: the clamp or grommet attachment, the arm's moving envelope and any clearance needed behind the desk.
Check the exact monitor's supported mounting interface and weight without its original stand, then compare these with the arm manufacturer's specifications. Read any restrictions for curved displays.
A screen-size label alone does not establish compatibility, and a nominal weight rating does not answer every question about tilt stability or extension.
Inspect the desktop as carefully as the arm. A rear apron, cable tray, hollow section, bevel or obstruction can prevent a clamp from seating correctly. The desk maker's guidance and arm instructions should govern the attachment.
The monitor-arm compatibility guide explains the measurements to collect before buying.
An arm is most valuable here when the stand blocks a keyboard or document position that otherwise works. It is less persuasive as a way to force a 60cm-deep desk into a wall gap where the arm itself needs rear space.
Draw the retracted and extended positions, and leave enough cable movement for adjustments.
Test viewing position without confusing it with desk depth
An 80cm desktop does not place the screen 80cm from your eyes. Your eyes are in front of the desk edge, and the display surface can sit at different positions relative to its stand.
Measure the actual distance after adjusting the chair and placing the equipment.
The HSE's workstation posture guidance uses about an arm's length as a starting reference and shows the screen and keyboard aligned with the user.
Treat that as a starting setup, then consider readability, your vision needs and the task. Do not choose a fixed distance solely because the screen is 34 inches.
Load the applications you actually use. Place the document or editor that receives most attention in a comfortable central region and assess the side windows during normal work.
If text is too small, investigate application zoom or display scaling before automatically moving the whole screen closer. If you repeatedly turn to read a far-edge panel, reconsider its window position.
Check the arrangement in daylight and after dark. A window reflected across the curved screen may affect where it can sit, while a lamp positioned in a narrow side gap can create a different problem.
Moving the desk or changing a light position may matter more than gaining another 20cm of width.
Choose the size using your own measurements
Open the ultrawide room-layout example and enter your room and furniture dimensions. Compare the desk footprints and chair positions there, then try the best-looking option with paper or removable tape.
Check the real support, cables and viewing position using your equipment and its instructions before buying.
Before ordering, record the monitor housing width, support envelope, desktop thickness, keyboard and mouse areas, and the equipment that must stay open. Photograph the existing desk from above if that helps reveal which objects compete for the same space.
Measure the room route used to bring the desk inside as well as the final location.
Choose 120 × 60cm if your measured compact arrangement works with the laptop closed and leaves an acceptable typing position. Test 140 × 80cm first when you want adjustment room for one ultrawide and ordinary office tasks.
Move to 160 × 80cm when a permanent laptop or physical-work area earns the extra width. The best size is the smallest arrangement that still supports your real equipment, normal movements and everyday tasks without repeated rearranging.
Keep exploring
Related home office guides
 34-inch ultrawide vs two 27-inch monitors for workCompare usable pixels, window layouts, screen sharing and connections before choosing a 34-inch ultrawide or two 27-inch monitors.60cm vs 80cm desk depth: what fits your workspace?Work out usable desk depth from the screen, stand, keyboard and room clearance, with three illustrated 60cm and 80cm examples.How much space do you need behind a desk for a chair?Measure occupied chair space, standing movement and a separate walking route, with a worked room plan you can edit before choosing a desk.