Buying guide
How to choose a monitor arm that fits your screen and desk
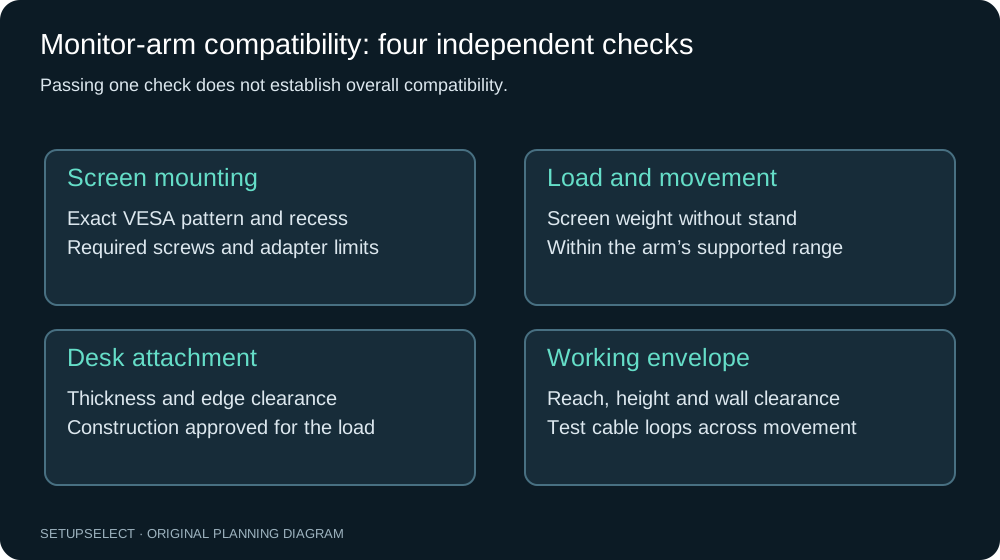
A compatible monitor arm must match the screen's mounting interface, supported weight range and physical requirements, while its desk attachment must suit the actual desktop. Screen size alone is not enough.
Before buying, identify the exact monitor model, its weight without the stand, the VESA pattern and the desk's material, thickness and underside obstructions.
This guide explains how to collect that evidence and test the proposed arrangement. It is not an installation certificate, and it does not authorise improvised reinforcement or unsupported mounting.
If the monitor, arm or desk instructions leave a critical question unresolved, ask the relevant manufacturer before proceeding.
Identify the exact monitor
Record the full model number and any regional or revision suffix. Similar-looking displays can have different housings, weights, stands and mounting recesses.
Use the manufacturer's specification or manual rather than assuming that a retailer's abbreviated product title identifies every relevant detail.
Keep the weight without the original stand separate from the shipping weight and the weight with stand. The arm supports the display assembly attached to it, not the discarded base.
Any accessories mounted to the screen or plate may add weight and alter the arrangement, so include them where the instructions require it.
If you cannot find a reliable weight or mounting specification, mark it as unknown. Estimating from a similar model can produce a plausible but unsuitable result.
A compatibility checker should expose missing evidence, not turn uncertainty into an automatic pass.
Check the VESA interface
The VESA mounting pattern describes the spacing between mounting holes, normally stated horizontally and vertically in millimetres.
Common small-display patterns include 75 × 75 and 100 × 100mm, but never assume a particular monitor uses one because of its diagonal size. Some screens require a manufacturer-specific adapter or do not support the intended mounting method.
Check the mounting recess as well as the hole spacing. A plate can match the pattern but fail to sit correctly because the rear housing is recessed or curved. Follow the monitor and arm instructions for plate shape, spacers and fasteners.
A screw that enters a hole is not necessarily the correct length or specification.
Do not improvise longer screws, stacks of washers or adapter plates without supported instructions. Excessive screw length can damage equipment, while insufficient engagement can leave the mount insecure.
If an approved adapter is required, include its compatibility and contribution to the assembly in the check.
Compare minimum and maximum weight
An arm's supported range may include both a minimum and a maximum. A display that is too light for a particular spring mechanism can be difficult to position, just as a display above the limit is unsuitable.
Use the exact range for the arm and configuration, not a family-level headline from an advertisement.
As a hypothetical example, a monitor weighing 4.8kg without its stand falls within an arm's stated 3–8kg range. That establishes only the weight part of the check. VESA, screen dimensions, curvature, plate clearance and desk mounting still need verification.
The same monitor would not meet a different arm's 6kg minimum even though it is below that arm's maximum.
For a dual arm, distinguish per-arm limits from a combined total. Do not assume a total can be allocated unevenly between the sides. Check whether supported weight or movement changes with an extension, accessory or unusual arrangement.
Follow the configuration-specific instructions.
Curved and ultrawide screens need extra care
A deep or strongly curved display can place its centre of mass differently relative to the mounting plate. A monitor may fall within a headline weight range yet still require a specific tilt mechanism or be excluded by the arm manufacturer.
Check explicit compatibility for the model or its documented dimensions and curvature.
Also check physical width and height against the arm's reach and adjustment. Two wide screens on a dual mount can collide before reaching the desired angle.
A tall display in portrait orientation may not clear the desktop even though the mount can rotate mechanically.
Treat a manufacturer's model-specific compatibility statement as stronger evidence than a generic diagonal range. If the documentation says an accessory or reinforced tilt head is required, do not assume the standard version is equivalent.
Keep the exact part identifiers on the shopping list.
Measure desk thickness at the attachment point
Measure the actual edge where the clamp will sit, not another part of the top. Bevelled edges, raised lips and reinforcing strips can change the effective geometry.
The top and bottom clamp surfaces need the contact specified by the manufacturer; an edge that looks thick enough may not provide the necessary flat area.
Check the arm's minimum and maximum clamp opening and any required adjustment positions. A 25mm-thick top falls within a hypothetical 10–50mm clamp range, but thickness alone does not establish suitability.
The material, local structure, finish and load requirements remain separate checks.
Look beneath the proposed location. A frame rail, drawer, cable tray or wall can obstruct the lower plate or adjustment handle. Measure the clearance needed to install and tighten the attachment correctly, not just the space it occupies after assembly.
Desktop material matters
Solid timber, engineered boards, hollow-core tops, glass and metal structures are not interchangeable mounting surfaces. Do not assume a clamp is suitable for a material simply because it opens wide enough.
Check both the desk and arm documentation, including any restrictions on mounting points or concentrated loads.
A reinforcement plate may be offered for some installations, but it does not automatically make an otherwise unsupported desk suitable. Avoid presenting a plate as a universal fix for glass, hollow construction or a damaged edge.
Manufacturer approval and structural suitability come before the convenience of an accessory.
Inspect the surface for existing damage and consider the finish. Even an approved clamp can mark a desk if installed or adjusted incorrectly.
Follow the specified procedure and protective components, and do not repeatedly over-tighten in an attempt to compensate for movement caused by an unsuitable attachment.
Clamp, grommet or another attachment
A clamp normally uses an accessible edge, while a grommet attachment uses a suitable opening through the desktop. These are different installations with their own dimensional and structural requirements.
An existing cable hole is not automatically a suitable mounting hole, and drilling a new one is not a routine assumption for a rented or shared desk.
Check opening diameter, edge distance, underside access and the supported top thickness for the chosen method. Ask permission before modifying furniture that is not yours.
For a wall-mounted arrangement, the wall structure and fixing requirements introduce a separate set of questions which this desk-focused guide does not certify.
Manufacturer attachment diagrams are particularly useful here. For an example of the distinctions, see Ergotron's desk-attachment guidance.
Use the instructions for your exact arm, not a different product whose attachment merely looks similar.
Draw the movement envelope
An arm occupies more space than its mounting plate. Draw where the screen and joints will be at the nearest, farthest, highest and lowest positions you intend to use. Include the wall, window, shelf, laptop and any second display.
A mount that fits the static desk edge may still be unable to place the screen where you need it.
Rear joint clearance is an especially common surprise. Some arrangements need space behind the desk when the screen is close to the mounting point. If the desk is against a wall, the arm may push the display forward or require a different clamp position.
Check a dimensioned reach drawing rather than relying on a staged photograph.
For two displays, test both normal use and adjustment. Moving one screen should not strike the other or drag its cables. If one display is primary, the ideal clamp location may not be the middle of the desk.
The dual-monitor desk guide shows how layout and mounting decisions interact.
Cable routing is part of compatibility
Display and power cables need sufficient length for the intended movement without being tensioned at the connectors. Route them according to the arm instructions and test all supported positions you expect to use.
A cable that works in the lowest position may become tight when the screen is raised or rotated.
Avoid forcing large connectors through clips designed for smaller leads. Keep bends appropriate for the cable and preserve access for disconnection.
If the desk itself moves, the arm's cable route and the desk's route need to work together, with no loop falling into a mechanism or walkway.
The cable-management guide describes a serviceable approach.
Good routing should make it possible to change one lead without dismantling the whole mount, while leaving the attachment available for inspection.
Three compatibility examples
In the first example, a 4.8kg display uses a 100 × 100mm interface and an arm supports 3–8kg with that pattern. The 25mm desk edge falls inside the stated clamp range, and the desk manufacturer allows the attachment.
This is a promising shortlist, but plate clearance, fasteners, movement and installation instructions still need checking.
In the second example, the same display is intended for a hollow desktop whose manufacturer provides no approval for the proposed clamp. Matching VESA and weight do not resolve the structural uncertainty.
The appropriate result is “needs verification”, not an automatic recommendation to add a plate or tighten the clamp harder.
In the third example, a wide curved display meets the nominal weight limit but the arm maker specifies a different tilt head for that model. The standard arm is not an equivalent choice.
Verify the complete compatible assembly and its price before comparing it with the supplied stand or another mounting option.
Installation and adjustment checks
Read the complete instructions before starting and arrange the help needed to handle the display safely. Keep the original stand and fittings unless the manufacturer directs otherwise.
Do not release or adjust spring mechanisms in ways the instructions prohibit, and keep hands clear of pinch points during movement.
After installation, check the attachment, fasteners, cable route and supported adjustment procedure. Stop if the desktop deforms, the attachment moves unexpectedly or the arm cannot hold the intended position.
Do not conceal a fault with extra friction or improvised bracing.
Inspect periodically as recommended, especially after moving the desk or changing displays. A previously compatible setup can change when a heavier monitor, accessory or replacement top is introduced.
Repeat the evidence check rather than assuming that an arm installed once remains suitable for every future configuration.
Your pre-purchase worksheet
| Check | Record before buying |
|---|---|
| Exact monitor | Model, revision and manufacturer source |
| Display assembly | Weight without stand and any approved accessories |
| Interface | VESA pattern, recess, required adapter and fasteners |
| Arm limits | Minimum/maximum weight and dimensional restrictions |
| Desk attachment | Material, thickness, flat contact area and approval |
| Underside | Frame, tray and installation-handle clearance |
| Movement | Screen and joint envelope at intended positions |
| Cables | Length, routing and connector access throughout movement |
Ask the seller a question they can answer
A useful compatibility enquiry identifies the screen model, its weight without the stand, its mounting pattern, the desk construction and the proposed attachment position. Ask whether that exact combination falls within the product's documented requirements.
A reply that merely repeats the advertised screen-diagonal range has not resolved the important checks.
For a recessed mounting area, include the recess dimensions and ask which approved spacers or adapters are required. For a shallow rear edge, include the distance to the frame or cable tray.
Do not assume that an adapter supplied with a different arm is appropriate.
Keep the answer alongside the manual and order details. If the delivered mechanism or mounting kit differs from the documentation, resolve the mismatch before installation instead of treating the previous answer as blanket approval.
Questions and next step
Does the same VESA pattern guarantee compatibility? No. It establishes only part of the mounting interface. Weight, recess, fasteners, physical dimensions, arm behaviour and desk attachment remain relevant.
Can an arm make any shallow desk work? No. It may free surface, but rear joint clearance can move the screen forwards. Check the desk-depth guide before assuming the benefit.
What if one critical specification is missing? Ask the manufacturer or keep the product off the approved shortlist. Unknown is a valid result.
Use the compatibility checker to organise evidence, then confirm the installation against the exact manuals.
For general selection context, Ergotron's arm-selection explanation illustrates why several checks are needed. All numerical examples here are hypothetical, not tested product combinations.
Continue researching