Buying guide
120cm vs 140cm vs 160cm desks: what actually fits?
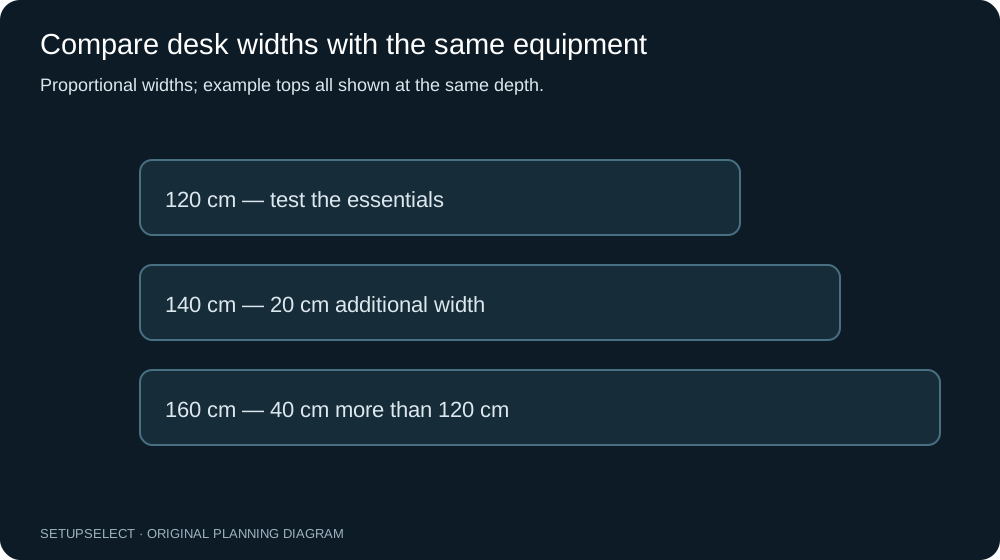
A 120cm desk is a useful compact starting point, 140cm provides more flexibility for computer work and a second task area, and 160cm is easier to organise when several devices or documents must stay out.
Those are planning tendencies, not product-fit guarantees. The right choice depends on your actual equipment, the clear opening beneath the desktop and the room around it.
This comparison keeps the equipment consistent while changing the surface width. That is more useful than comparing three staged product photographs containing different accessories. All layouts and budget-free examples below are illustrative.
Use the exact dimensions of your own products before making a purchase.
Separate furniture width from working width
Advertised width normally measures the desktop from side to side. The usable working area may be smaller because of rounded corners, raised shelves, storage units or accessories fixed to the surface.
Underneath, drawers and legs can leave a much narrower opening for the chair than the desktop suggests.
Start with two measurements: uninterrupted surface width and clear under-desk width at the position where you intend to sit. Then measure the maximum room width at desktop height.
A wall that is 160cm wide near the floor may be interrupted by a radiator valve, sill or curtain higher up. The smallest usable measurement is the one that matters.
A desk does not need to fill every available centimetre. You may need side access for assembly, cleaning, a cable route or an adjustment handle. Allowances depend on the design; check the instructions rather than adding an arbitrary universal gap.
A precisely fitted top can still be inconvenient if its fixings become inaccessible after installation.
A laptop-first arrangement
Suppose an open laptop occupies a 34cm-wide area, a compact keyboard 36cm, and the chosen mouse movement area 25cm. If these were placed in one row they would require 95cm before gaps, but a real arrangement often places the laptop behind the keyboard.
The width needed is determined by the widest row and the overlap between tasks, not the sum of every object.
On a 120cm desk, that laptop-first arrangement can leave room for a notebook or charging area, provided the depth supports the separate input devices. A 140cm surface may allow the notebook to remain open rather than being moved between tasks.
A 160cm surface is unlikely to be necessary solely because the computer is a laptop; it needs another practical purpose to justify the room space.
Do not confuse “space available” with “everything should be spread out”. Keep frequently used items close to the working position and use the remainder for a deliberate secondary activity. A long reach to the mouse is not a sensible use of a wide desktop.
See the ergonomic laptop setup guide for configurations that separate screen and input positions.
One monitor plus an open laptop
Now use a 60cm-wide monitor housing and a 34cm-wide open laptop. A simple side-by-side row with a 5cm gap occupies 99cm. On a 120cm desk that leaves 21cm in total around that row. On a 140cm desk it leaves 41cm; on a 160cm desk it leaves 61cm.
These are widths of the selected example objects, not dimensions of all monitors or laptops.
The keyboard and mouse sit in a different row, so they should not automatically be added to 99cm. However, their preferred position can clash with monitor feet or a laptop stand. Draw both rows at once, including support shapes.
A desk with enough total area can still have an awkward arrangement if the only clear keyboard position is offset from the main screen.
If the laptop is merely a secondary messaging display, consider whether it needs to remain open throughout the day.
A supported closed-laptop setup may reduce clutter, but do not assume a particular device supports that mode or that any vertical holder provides suitable cooling. Check the device instructions and connection requirements first.
Two 27-inch monitors
For two illustrative 60cm-wide housings with a 2cm central gap, the straight span is 122cm. That is wider than a 120cm desktop, fits within 140cm with 18cm total spare, and leaves 38cm total spare on 160cm.
The real result changes with housings, angles, mounts and how the pair is positioned relative to you.
Angling the screens can reduce projected width while increasing depth. Monitor arms may make the supports easier to arrange, but they add clamp and rear-clearance constraints.
Do not solve the width problem by overlooking the desk's load rating or the arm manufacturer's mounting requirements. Read the two 27-inch monitor desk guide for the geometry and limitations.
| Example arrangement | 120cm desktop | 140cm desktop | 160cm desktop |
|---|---|---|---|
| Laptop with separate keyboard | Measure depth and support overlap | More room for a second task | Often more width than the computer itself needs |
| 60cm monitor plus 34cm laptop, 5cm gap | 21cm total width remaining | 41cm remaining | 61cm remaining |
| Two 60cm screens, 2cm gap | 2cm overhang in straight projection | 18cm remaining | 38cm remaining |
| Computer plus permanent paperwork | Requires careful zoning | Often a useful compromise | Easier to retain separate areas if the room permits |
Paperwork changes the decision
An A4 sheet is 21 × 29.7cm, but the actual task may require an open notebook, a calculator and somewhere to rest a hand. A document holder behind the keyboard uses a different area from a notebook beside it.
Measure the task in the orientation you use, rather than allocating the closed dimensions of an item that is normally open.
For example, reserve a 35cm-wide writing zone beside the computer inputs. If the keyboard and pointing area together need 65cm, the front working row is around 100cm before separating gaps. That can fit a 120cm desk in principle.
The problem may appear behind it, where a monitor base and open laptop occupy the same corner as the notebook.
A 140cm desk is useful when it lets the writing zone stay in place without changing the computer position.
A 160cm desk can accommodate a more substantial permanent task area, but only if the extra width remains reachable and does not tempt you to accumulate unnecessary equipment.
Judge the arrangement by task transitions, not by how empty or full a photograph looks.
Consider a shared desk
If two people use the same desk at different times, the adjustment range and reset process matter more than the number of centimetres. Record each person's preferred chair position, display position and input arrangement.
Check whether the equipment can move without disconnecting everything or lifting heavy devices.
If two people intend to work at the desk simultaneously, do not assume 160cm is automatically enough. Each person needs a working area and independent access, and the supports underneath may divide the space badly.
Two compact desks may be more adaptable than one long surface, but that introduces additional legs and cable routes. Sketch both options using occupied chairs.
A shared surface also needs a storage plan. One person's keyboard or documents should not have to be piled beneath another person's monitor.
Decide where items go when the desk changes hands and measure that storage, especially if a room must return to dining or guest use at the end of the day.
Width cannot fix insufficient depth
A 160 × 50cm desk is not simply a superior version of a 120 × 80cm desk. The first provides lateral space but may constrain monitor supports and input placement. The second provides depth but fewer side-by-side zones.
Compare width and depth as separate axes, with your hardest-to-fit task guiding the trade-off.
For monitor work, draw the screen surface, support base, keyboard and rear cable clearance. For paperwork, draw the open document rather than its closed storage size. If the same object moves between positions, include both operating states.
The 60cm versus 80cm depth guide helps build that second part of the comparison.
Corner desks and curved fronts require particular care. A retailer's maximum width may describe a dimension that does not correspond to the usable straight edge where you sit. Check a dimensioned drawing and measure the intended sitting position.
Do not compare irregular tops solely by their largest advertised dimensions.
Check legs, drawers and armrests
Measure the width between the supports at knee height and at the floor. An angled frame can be wider at one level and narrower at another.
Record cable trays, crossbars and drawer pedestals, then compare them with the chair base and the movement needed to stand up. The chair measurement guide includes a worksheet for these checks.
Armrests may prevent a chair from tucking underneath, even when the desktop is at a suitable height. A wide top does not solve that vertical conflict.
Adjustable armrests or a different frame can help, but verify the actual ranges and compressed seat height rather than relying on a photograph of an empty chair beneath the desk.
For a standing desk, inspect the manufacturer's stated load and frame-extension limits for the proposed top. Do not place a larger replacement surface on a frame simply because the screw holes can be made to line up.
Compatibility, stability and assembly instructions are product-specific.
Three room examples
In a narrow spare-room office, imagine a 150cm clear wall after accounting for a radiator and door trim. A 140cm top might leave modest side access, whereas a 160cm top cannot fit that measured wall.
A 120cm top may be preferable if you need to reach a socket or keep a small cabinet beside it. The room limit takes precedence over a generic monitor recommendation.
In a bedroom, a 160cm desk might fit along the wall but overlap the opening arc of a wardrobe. Mark the door open and place the chair in its pulled-back position.
If using the wardrobe requires moving the desk chair into the bedroom doorway, the layout is not solved merely because all furniture footprints fit on the floor plan.
In a dedicated office with generous access, a 160cm top can provide a useful computer zone and a separate paperwork zone. Keep the working position aligned with the main task and avoid placing routinely used objects at the far end.
The extra space should remove friction from the day, not introduce more reaching.
Delivery and future changes
Record the package size, weight and assembly sequence. A long desktop may need two people to carry safely or may not turn through a narrow landing.
Ask whether the top is one piece or split and consider whether a join will affect writing or mounting accessories. Delivery feasibility belongs in the shortlist before a product is ordered.
Also consider the next likely change, not every imaginable upgrade. If you expect a second monitor soon, test that arrangement now. If a move to a smaller room is likely, portability and disassembly may be more important than maximum width.
Avoid buying a large desk for speculative equipment that has no clear place in your actual workflow.
A repeatable selection method
- Measure the maximum room footprint and delivery route.
- Draw the exact equipment in its operating position, including support bases.
- Test 120, 140 and 160cm boundaries around the same arrangement.
- Check depth, underside clearance, chair movement and nearby doors.
- Identify what the extra 20cm genuinely improves at each step.
- Compare only desks whose manufacturer information resolves the remaining fit questions.
Use desk comparison to inspect sourced dimensions, then the desk-space calculator for a broad planning estimate.
A positive calculator result does not establish structural suitability, assembly access or personal ergonomic fit. Keep the manufacturer's instructions and the physical room rehearsal as the final checks.
Questions and method
Is 140cm the best compromise? It is often worth testing because it adds useful width without the full footprint of 160cm. It is not a universal optimum. Your equipment, room and task sequence may make 120cm sufficient or 160cm genuinely helpful.
Can I let a screen overhang? Check its support, the desk and arm instructions, and the surrounding collision risk. This article does not certify an overhanging installation.
A screen housing fitting in the air is different from a stand base being fully and correctly supported.
Are the layouts product tests? No. They are original planning calculations using explicitly stated example dimensions. Replace every example measurement with your own before buying.
For the wider workstation context, use the HSE workstation checklist, and consult manufacturer drawings for each actual desk and accessory.
Continue researching